Hexagonal Grid System - NEW PRODUCT
A heading goes here

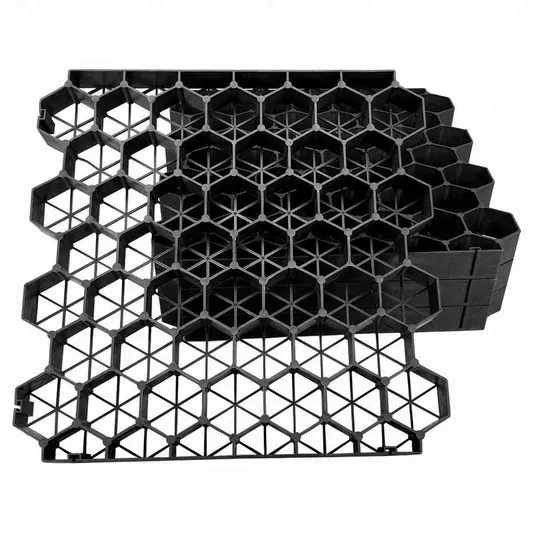
Hexagonal Grid System - NEW PRODUCT
Advanced plastic hexagonal grid systems designed for driveways, turf reinforcement and slope stabilisation.
Whether you’re creating a modern, sleek driveway, stabilising a grassed slope, or building a heavy-duty parking area, these grids deliver unmatched strength, durability, and natural appeal. With an impressive load-bearing capacity of up to 300 tons per m², they are built to handle even the toughest residential, commercial, and industrial applications. Beyond driveways, this systems is trusted across mining sites, construction projects, and large-scale commercial car parks.
Choosing this grid system doesn’t just mean strength—it also means better value. This grid system can be up to 50% more cost-effective than concrete, while offering a far more attractive and natural look that seamlessly blends into any environment.
You don’t just build—you create strong, stable, and stunning surfaces built to last.
Applications:
Driveways, Car / Boat / Caravan Parking, Stable & Shed Floors, Truck Yards, Erosion Control and Slope & Embankment Stabilisation
Dimensions:
One piece is 500mm x 500mm x 50mm = 0.25sqm
Four pieces per sqm
Grid Installation Guide
1. PREPARE YOUR SURFACE
Start by clearing and levelling the area where your grids will be installed. Remove debris and smooth out any uneven patches. Please note: installation is not recommended on slopes greater than 15%.
2. LAY DOWN ROAD BASE
Spread a layer of road base or fine gravel over the prepared area, adjusting depth based on the traffic load (light foot traffic vs. driveways). Compact thoroughly to form a stable, even foundation.
3. INSTALL GEOTEXTILE MAT (IF REQUIRED)
Place the geotextile mat across the compacted base, ensuring it lies flat without wrinkles or folds. This step helps with soil stability and drainage.
4. MEASURE & CUT THE GRIDS
Use simple tools such as a handsaw or grinder to cut grids to fit your project area. Measure carefully and trim as needed for a precise fit.
5. CLICK GRIDS INTO PLACE
The interlocking design makes installation quick and easy. Simply click each grid into the next, making sure all joins are tight and secure for a solid surface.
6. SECURE THE EDGES (IF NECESSARY)
For high-impact zones like driveways, we recommend pinning the outer perimeter with metal stakes. This prevents shifting under vehicle pressure or heavy water flow. If you are not using curbs or edge restraints, pinning is essential to maintain stability—though you only need to secure the perimeter, not every grid.
7. FILL THE GRIDS
Once connected, fill the grids with your chosen material: gravel, crushed rock, decorative stone, soil, or turf. For high-traffic surfaces, gravel or crushed rock is best for strength and durability, while soil and grass are perfect for landscaped areas. Overfill slightly (around 15mm) so that after compaction, the grids are fully concealed. The interlocking cells lock the material firmly in place, preventing sinking or shifting over time.
8. COMPACT & FINISH
Compact the filled surface and ensure all grids are covered. Rake the area for a smooth, even finish, add extra fill where needed, and tidy the edges. Once complete, your surface will be strong, stable, and ready to use.
Enjoy your new installation.